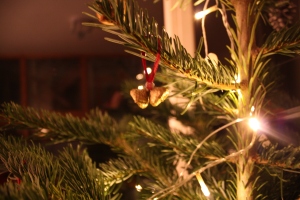
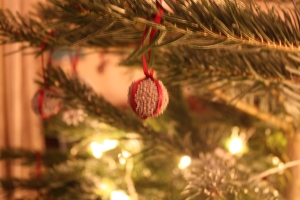
An adorable Christmas favour.

It’s been an absolutely manic at the office this week, but there is always time to spread a little Christmas cheer. This year myself and a colleague decided to surprise everyone with their very own little Christmas stocking.

These are really simple and straight forward, and make a lovely alternative to Christmas cards. If you want to give it a go yourself, here’s how we did it.

Firstly, we located our nearest bargain warehouse, making stockings for everyone in an office of 10 people could have been very expensive if it wasn’t for the likes of Poundland, B&M and Aldi. We stocked up on multipacks of Christmas socks, candy canes, chocolate coins, toffees, small oranges, and gift tags.

Image

To make each stocking a little more personal we included a small gift for each recipient to accompany the other goodies. We also attached individual name tags to the candy canes.

Image

Once we had filled the socks with gifts, we poked a candy cane into the top of each stocking so that the name was clearly visible.

Image

Then came the fun part. We waited until everyone had gone home for the night, and snuck around like Santa’s elves, attaching the filled stockings to each persons notice board. So that everyone would be met with a surprise when they arrived at work the next morning.

Image

Needless to say these were received very well.

The finished product

Now I’ve given you a taste of how to make all my natural Christmas decorations I couldn’t resist sharing how the finished tree looks.

IMG_0005

Aside from the fairy lights, and an adorable wooden heart garland that I purchased from Hobbycraft, everything on the tree is hand made.

IMG_0006 (2)

I’m very happy with the result, and it smells absolutely amazing.

Special thanks to Lola Dack for the second photo, and for assisting me with decorating the tree 🙂

A handmade Christmas part four: twig star

The final step product on any well decorated Christmas tree is a nice star. In keeping with my theme I decided to make one. This was one of the easier decorations I made, and I am very happy with the result.

First things first, you need to go out and collect some twigs. I went for a lovely walk in the Gog Magog hills with my boyfriend a few months ago and collected plenty, at this time of year there will be a great selection of twigs on the ground in any wooded area.

Choose five or six twigs depending on the type of star you want to make (I went with a five pointed star) and cut them down to roughly equal size. If you want, you can select twigs that are perfectly straight, and cut them to exactly the same size, but I prefer the more natural twiggy look, and quite like the effect of a bit of differentiation and a few knots here and there.

Image

Cross two of the twigs pieces at a point just below the top of the twigs, angle the pieces so they make an acute angle. Secure the two twigs together using either a hot glue gun, or craft glue. Place the 3rd twig horizontally across the first two, about a quarter of the way down from the point of the first two twigs, and secure with glue. Place the 4th twig diagonally from the left side of the horizontal twig to the bottom of the right twig, secure with glue, and repeat the process on the other side with the 5th twig. The twigs should now resemble a five point star as shown below.

Image

Once the glue is dry, wrap a piece of string, or ribbon around the intersection of the top point of the star, then tie the string off to make a loop.

Image

Voilà, the star is complete and ready to adorn your Christmas tree.

A handmade Christmas part three: Cinnamon sticks

Nothing says Christmas quite like the sweet smell of spices. This is a decoration that will look lovely on your tree, and make your house smell delectable too.

The first thing you need is cinnamon sticks. I very much doubt even the most avid crafter will go out and harvest the inner bark of cinnamomum trees to make their own sticks, so you don’t need to feel bad about buying them. I would stay away from buying the normal sticks that you find in supermarkets though, they can be bought much more cheaply through floristry supply shops. They are more hollow than the ones used for cooking, but still look and smell just as good.

pile-of-cinnamon-sticks

Firstly you need to bundle the cinnamon sticks, I arranged mine into little piles of three. Bind the sticks together using hot glue gun, if you don’t have one ordinary craft glue will do, the bundles will just need to be left to dry for longer. Once the glue is dry use a piece of coloured ribbon to tie around the sticks. Raffia or sting would work just as well it’s purely a matter of personal taste. I used red ribbon for all of my decorations. 

IMG_0008

Once the cinnamon sticks are tied together you can add an extra loop of ribbon can be attached to the existing bow, or fixed onto the bundle using glue, to make a hanger. 

Image

Bundles of cinnamon sticks hung on a tree look and smell really lovely, but they can be used for all sorts of other Christmas crafts too. Try using the assorted bundles to make table decorations, or add to a plain Christmas wreath for a personal touch. 

Cute candy mice

I found these adorable alternatives to candy mice at a craft fair this week. They look fantastic, and would be really simple to make, but I did my bit for the local church by buying them instead.

The mice themselves are made from coloured foam paper, and a candy cane tail slotted into the back completes these festive little goodies.

image

These would make perfect stocking fillers. I can’t wait to see the reaction they get.

‘Brown paper packages tied up with strings, these are a few of my favourite things’

If you are a dab hand at wrapping, then beautiful, shiny wrapping paper, ribbons and bows can make a present look almost too good to touch… But I’ve never been that elegant, and I always find it best to keep things simple.

This year I have decided to go with the ever popular brown packaging paper and white string. I fits in perfectly with my rustic theme.

I spent hours in hobby craft gazing at the beautiful gift tags, before I decided to ditch the unnecessary frills, and instead chose a big pack of plain, cream coloured, cartridge gift tags.

I used my developing calligraphy skills to personalise the gifts, with a nice red ink to add a little festivity, and I am really happy with the results. I think it looks lovely alongside the wrapping paper. For those of you who are interested, I used a wide nibbed calligraphy pen and gothic textura quadrata script.

Image

A handmade Christmas part two: All natural baubles

My next lot of decorations can be bought from just about anywhere in the run up to Christmas, but it’s always more fun to make your own.

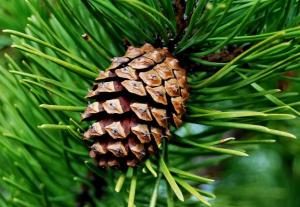
For my all natural baubles I decided to use pine cones. I absolutely love pine cones, and think they make a great addition to just about any Christmassy craft. If you’re not as fanatic about pine cones as I am, whole nuts work just as well. Walnuts in particular look lovely hanging from a tree.

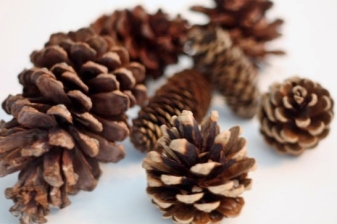
First of all I collected a mountain of pine cones (If you’re not lucky enough to have pine trees near your house, they can be purchased quite cheap from floristry wholesalers).

scotch-pine-cone-marilynne-bull-jpg

If you collect the cones yourself leave them in a warm place for a few days to dry out and fully open up. Once the cones are dry they are ready to be painted.

Image

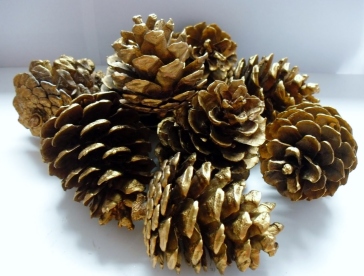
Metallic paints work really well with the earthy wooden colours of pine cones, choose a colour that matches your theme, I used a combination of gold, silver, and iridescent glitter spray paint (poster paint works just as well, but will take a little more time). If you are using spray paint be sure to do it in a well ventilated area, and leave the paint to dry over night.

Image

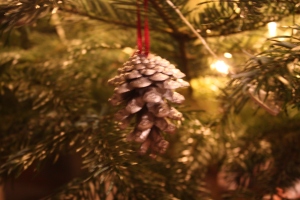
Once the paint is dry, tie string, or ribbon into a loop, and secure it to the top of the pine cone using a hot glue gun. Alternatively, metal decoration hangers can be purchased from most craft shops, these can be simply pressed into the top of the pine cones.

When the glue is dry the decorations are ready for hanging.

IMG_0012 (2)

As alternatives decorations I used the same process to hang acorns

IMG_0001 (2)

and London plane tree fruit.

IMG_0001

The great thing about crafting with natural items such as this, is that they need so little work to end up looking lovely. I’m going to fill a clear glass vase with my left over cones to make table decorations for when the family are over.

A handmade Christmas part one: Orange Slices

It’s my very first time as a host for Christmas, and to say I am excited is a bit of an understatement. What better way to curb my enthusiasm then to throw all my extra energy into creating a lovely, handmade Christmas decorations.

I’ve opted for natural materials where possible, and have spent so much time over the past few months collecting acorns, pine cones, twigs and other seasonal goodies. A lot of what I have used have been things foraged from the woodland floors surrounding our home. All apart from the Christmas tree itself, which for obvious reasons needed to be authentic, and so did set us back a few pennies.

My first step towards my perfect handmade Christmas was making dried orange slices.

I used clementines for mine, as our house is always inundated with these, one of the benefits of having a mother who works for a fruit packaging plant. You can can substitute any citrus fruit to suit your needs, lemons and limes work just as well.

First I sliced the oranges into fairly thin slices, mine were roughly 1cm, but you can do this by eye, they need to be thin enough to dry, but not so thin that they fall apart.

orange1 (2)

Once you have sliced as many oranges as you need it is time to start the drying process. If you are lucky enough to own a food dehydrator this is where this comes in handy. If not, a low oven (about 120 degrees Celsius) will work just as well. Place the orange slices on a wire rack (this is really important, as they will stick if placed directly onto an oven dish), in a warm oven for two or three hours turning at least once, turning the slices more often will prevent sticking.

orange slices dried (2)

Alternatively, the slices can be placed onto kitchen roll, and placed onto a radiator or in a warm place such as an airing cupboard for several days. 

The drying process will cause the fruit to lose some of their colour, they will take on a more rustic, terracotta shade than the original bright orange.

???????????????????????????????

Once the fruit is dry you are ready to prepare the slices for hanging. Using a kitchen skewer, or other sharp object (I used a cork screw) make a small hole in the top of each slice. Then simply pass a ribbon, or string through the hole and tie to create a loop.

IMG_0001

The finished decorations are truly stunning when backed by fairy lights. Akin to tiny, festive, stained glass windows.